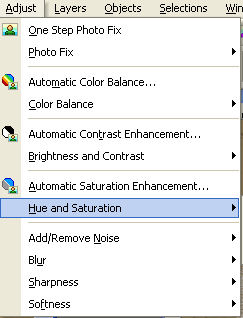
Made in psp9
Supplies 
The Image " below you can use as "pointer" so you
know how far you are

New layer str 576x455 transperant
Open your backgroundimage "Kort"
Select all - layers - new layer and paste into selection
Layers - New layer and floodfill with the color b19565 and lower opasity
to 62
Select none
Activate tube "SM Orange peel and paste as new layer
resize 6 times
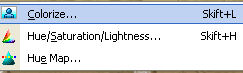
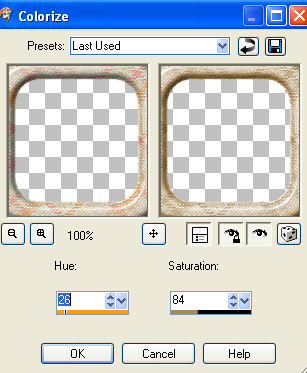
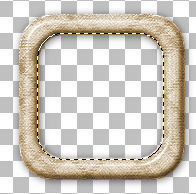
Colorize frame to same color as your backgroundcolor b19565
Like this:
and the frame now looks like this
Place the frame to the top left side ( see finished image)
Dublicate the frame- Image - Free Rotate with these settings
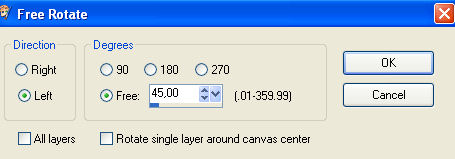
Move the dublicated one down so it looks like it hanging together
With your lasso tool draw like here:
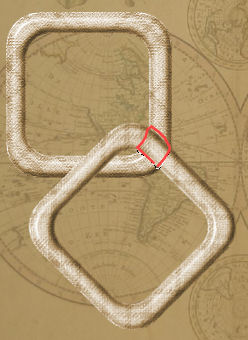
and click delete
Add drop shadow on both frames

Lock all layers BUT raster 3 (the first frame)
Click in the center with your magic wand with these settings

Keep clicking till the whole selection reaches the edge
Selections - Modify - Expand - 1 and click ok
Layers New layer - floodfill with b19565
Still selectet - activate the tube with the heart- edit - copy
paste into selection - select none
Unlock all layers
Activate the lady tube - resize 4 times - click your eraserand erase
all sticking out under the frame
Activate tube"Sting" - copy and paste as new layer and move
it into place
Activate chain tube- resize 2 times and place it so it "holds"
the frame
Activate letter tube- resize 2 times and lower opasitya bit- move
into place
Activate sunset tube - and place up - and to the right
Activate tube"knappenålen" and place it in the edge
of "sunset"
Add drop shadow -same as earlier
Activate your 2 text tubes - resize 2 times and place where you like
Click layer background- activate selection tool "circle"
and draw a circle
in the circle where the text is
activate lighten/darken tool
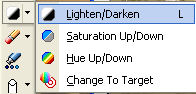
with these settings

click with mouse a few times in the circle - it Lightens the area
a bit
Select None
Now to the animation
Open AS og find your animation "Etoiles" - it has 13 frames
I resized mine 2 times
Click your image- edit - copy merged and paste to AS as new animation
Dublicate your image till you have 13 frames
Activate your image- edit - select all
activate animation - edit - select all - copy
back on your image - edit - paste into selection
and gently place your stars animation
Check the animation - satisfies ?
Then you're FINALLY done!!!
I hope you like doing the tutorial
Hanne